
Manual water softener regeneration is a vital process to maintain optimal performance. It involves flushing the system with a salt solution to remove accumulated minerals. This process ensures soft water by replacing hard water ions with sodium or potassium. While many modern systems automate this cycle, understanding how to initiate it manually provides better control and troubleshooting capabilities.
What is Water Softener Regeneration?
Water softener regeneration is a process that removes accumulated minerals, like calcium and magnesium, from the resin bed. It involves flushing the system with a concentrated salt solution to replace hard water ions with sodium or potassium. This process restores the softening capacity of the resin beads, ensuring soft water production. Regeneration is essential for maintaining system efficiency and water quality. While automatic systems handle this cycle, manual regeneration allows users to control the process, especially during initial setup or troubleshooting.
Why Manual Regeneration is Necessary
Manual regeneration is essential for maintaining water softener efficiency, especially when the automatic cycle fails or during initial setup. It ensures the resin bed is properly cleansed of accumulated minerals, restoring its softening capacity. Manual control allows users to address specific issues, such as persistent hard water, by initiating a regeneration cycle immediately. This process is crucial for troubleshooting and ensuring consistent water quality. Regular manual checks can prevent system malfunctions and extend the lifespan of the softener, making it a vital skill for homeowners reliant on softened water.

Understanding Your Water Softener
A water softener removes minerals causing water hardness. It uses a salt solution to replace calcium and magnesium with sodium or potassium, improving water quality. Regular maintenance ensures optimal performance, preventing scale buildup and extending appliance lifespan. Understanding its operation is key to effective manual regeneration and troubleshooting.
Key Components of a Water Softener System
A water softener system consists of a resin tank, control valve, salt tank, and drain line. The resin tank holds resin beads that trap hard minerals. The control valve regulates water flow and initiates regeneration. The salt tank supplies salt for the regeneration process, while the drain line removes wastewater. These components work together to remove calcium and magnesium, ensuring soft water output. Understanding these parts is essential for effective manual regeneration and system maintenance.
How Regeneration Works
Regeneration involves flushing the resin bed with a concentrated salt solution to remove trapped minerals like calcium and magnesium. This process restores the resin beads’ ability to soften water. The cycle includes stages such as backwashing, recharging, and rinsing. Manual regeneration can be initiated by pressing the Regen button on the control panel. The system then uses the salt solution to clean the resin and flush out hardness ions. This process ensures the water softener operates efficiently, providing soft water consistently. Regular regeneration is crucial for maintaining system performance.

Preparing for Manual Regeneration
Preparing for manual regeneration involves ensuring the salt tank is filled and the system is ready for the process. Gather necessary materials and understand the steps involved to ensure a smooth regeneration cycle.
Disconnecting the Power Supply
Before initiating manual regeneration, ensure the water softener is disconnected from the power supply. This step is crucial for safety and prevents electrical hazards. Locate the power source, such as a circuit breaker or plug, and switch it off. Verify that the system is completely powered down by checking for any lights, sounds, or movement. This precaution ensures you can safely perform the regeneration process without risking electrical issues or damage to the system.
Gathering Necessary Materials
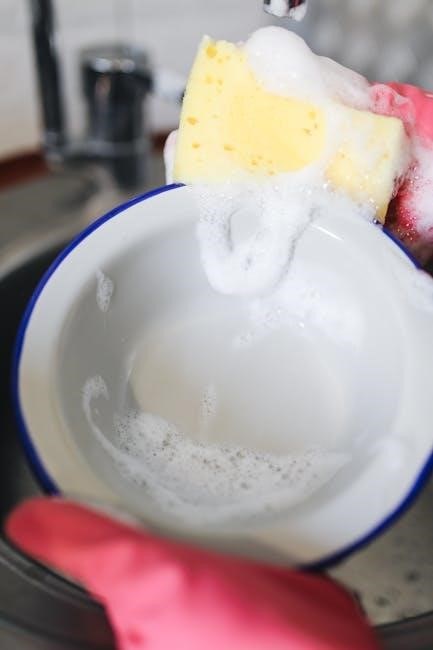
To manually regenerate your water softener, you’ll need specific materials. Start by ensuring you have water softener salt, which is essential for the regeneration process. You’ll also need a clean container to mix the salt solution and a funnel to safely pour it into the salt tank. Additionally, protective gloves and goggles are recommended to handle the salt and liquids safely. A drain hose or bucket may be required for flushing wastewater. Ensure all materials are readily available to streamline the process and avoid delays during regeneration.
Priming the Salt Tank
Priming the salt tank is essential before manual regeneration. Start by adding water to the tank until it reaches the recommended level, usually a few inches deep. Next, pour in the water softener salt, following the manufacturer’s guidelines for the correct amount. Allow the salt to dissolve completely before proceeding. This step ensures the brine solution is properly formed, which is crucial for effective regeneration. Always check the water level to prevent overflow and ensure optimal performance during the manual regeneration process.

Initiating Manual Regeneration
Press the “Regen” button on the control panel to begin the manual regeneration process. Ensure the salt tank is prepared with the correct amount of water and salt. Allow the cycle to complete, which may take several hours. Monitor the system for signs of proper function, such as water flow and indicator lights. After completion, flush the system to remove any residual brine solution. Regular manual regeneration helps maintain soft water quality and system efficiency.
Accessing the Control Panel
To begin the manual regeneration process, locate and access the control panel on your water softener. Typically found on the top or front of the unit, it features buttons or a touchscreen interface. Look for a “Regen” or “Regenerate” button, which is usually labeled clearly. Press and hold this button until the display indicates that the regeneration cycle has started. Some systems may require entering a specific sequence or confirming the action. Once initiated, the system will proceed through the cycle, which may take several hours to complete. Ensure you are prepared to monitor the process and handle any necessary maintenance afterward.
Starting the Regeneration Cycle
Once you’ve accessed the control panel, press the “Regen” or “Regenerate” button to initiate the cycle. Hold the button until the display confirms the process has started. Some systems may require entering a specific sequence or confirming the action. The regeneration cycle will begin, lasting several hours. During this time, the system will flush out hardness minerals and recharge the resin bed with sodium or potassium ions. Ensure the salt tank is filled with water before starting, as this is essential for the regeneration process to work effectively. Monitor the cycle to ensure it progresses smoothly.
Manual Override Procedures
To manually override the regeneration cycle, locate the control panel and identify the manual override button, often labeled “Regen” or “Regenerate.” Press and hold this button for a few seconds until the display indicates the cycle has started. Some systems may require entering a specific sequence or code to activate manual mode. Ensure the system is in service mode, not bypass, and verify the salt tank is primed with water and contains sufficient salt. If unsure, consult the user manual or online resources for model-specific guidance.
Monitoring the Regeneration Process
During regeneration, observe the system’s cycle stages, such as backwash, brine injection, and rinse. Listen for water flow sounds and ensure the process progresses smoothly over 1-2 hours.
Understanding the Stages of Regeneration
The regeneration process typically includes backwash, brine injection, rinse, and return to service. During backwash, water flows reverse to clean the resin bed. Next, brine solution is drawn into the tank to replace trapped minerals. The system then rinses thoroughly to remove excess brine. Finally, it returns to normal operation, ready to soften water again. Each stage is crucial for restoring the softening capacity of the resin beads. Monitoring these steps ensures the process completes successfully, maintaining water quality and system efficiency.
Signs the Process is Working Correctly
During manual regeneration, you may hear gurgling or rinsing sounds as water flows through the system. The brine tank will begin to replenish, and you’ll notice water flowing into the drain. The system will cycle through backwash, brine injection, and rinse phases. If the process completes without interruption, soft water should flow again. Look for indicators like the control panel displaying a completion message or the return of soft water feel. These signs confirm the regeneration cycle is functioning as intended.
Troubleshooting Common Issues
If the system doesn’t start, check the power supply and ensure the bypass valve is closed. Low salt levels can prevent proper brine flow, so refill the salt tank if necessary. Air in the lines or blockages in the resin bed may cause irregular water flow. If the control panel shows an error, refer to the manual or reset the system. If issues persist, such as no water flow or continuous cycling, it may indicate a malfunction requiring professional assistance. Always follow safety precautions when troubleshooting.
Post-Regeneration Steps
After regeneration, flush the system to remove residual salt and debris. Check for leaks in connections and valves. Resume normal water usage, ensuring soft water quality.
Flushing the System
After manual regeneration, it’s essential to flush your water softener system to remove any residual salt and debris. Open the drain valve to release the brine solution and let it flow freely. Then, run fresh water through the system by opening a faucet to rinse out any remaining saltwater. Continue flushing until the water flows clear, ensuring no contaminants remain. This step ensures optimal water quality and system performance. Regular flushing helps maintain the longevity of your water softener and prevents clogging or damage to internal components. Always follow the manufacturer’s guidelines for the flushing process to ensure effectiveness and safety.
Checking for Leaks
After initiating manual regeneration, it’s crucial to inspect the system for any leaks. Start by examining all connections, valves, and hoses for visible signs of moisture or water droplets. If you notice any leaks, tighten the connections immediately and ensure all components are securely fastened. Additionally, monitor the drain where the brine solution is discharged to confirm it’s flowing freely without backing up. Addressing leaks promptly prevents water damage and maintains system efficiency. Regular checks help identify potential issues before they escalate, ensuring smooth operation and prolonging the lifespan of your water softener.
Returning to Normal Operation
Once the regeneration process is complete and leaks are addressed, allow the system to restart automatically. Ensure all valves are in their normal operating positions and the bypass valve is closed. Verify that water flows correctly through all taps and appliances. If the softener is connected to a bypass loop, make sure it is set to “service” mode. Monitor the system to confirm soft water is being delivered. If everything functions properly, the softener is ready for normal use. Always ensure the bypass valve is fully closed to maintain water treatment efficiency.
Maintenance and Follow-Up
Regular maintenance ensures optimal performance. Clean the resin bed annually and check salt levels monthly. Schedule future regenerations based on water usage and system recommendations.
Cleaning the Resin Bed
Cleaning the resin bed is essential for maintaining water softener efficiency. Use a water softener cleaner or Brine solution to remove built-up impurities. Dissolve the cleaner in water, pour it into the salt tank, and let it sit before starting a manual regeneration cycle. This process helps restore the resin’s ability to exchange ions effectively. Regular cleaning prevents mineral buildup and ensures soft water quality. Perform this maintenance every 1-2 years or as needed based on water usage and hardness levels. Always follow the manufacturer’s recommendations for cleaning products and procedures.
Checking Salt Levels
Regularly checking salt levels in your water softener is crucial for optimal performance. Low salt levels can lead to ineffective regeneration and hard water issues. To check, inspect the salt tank and ensure the salt level is above the recommended minimum. If the salt is low, add high-quality water softener salt or pellets as needed. Avoid overfilling, as this can cause bridging or clogging. Always refill before starting a manual regeneration cycle to ensure the process is efficient. Maintain consistent salt levels to prolong the system’s lifespan and effectiveness.
Scheduling Future Regenerations
Scheduling future regenerations ensures your water softener operates efficiently. Access the control panel and set the regeneration time based on your water usage patterns. For automatic systems, program the cycle to run during low water demand, such as overnight. For manual systems, mark your calendar to initiate regeneration regularly. Adjust the frequency based on household water consumption and hardness levels. Consistent scheduling prevents mineral buildup and maintains soft water quality. Always refer to your system’s manual for specific programming instructions to ensure optimal performance.